Saturday, June 25, 2011

Process: Staining a Canvas

Once the canvas has been stretched, I typically stain the canvas with a medium tone.  For the past couple of years I've been using a medium brown color.  It just seems to work.  That way I'm not starting with a start white sheet in front of me.  I find it simpler to move from the medium tone to lighter and medium to dark, than to have to make even my lightest tones darker than the actual canvas.

It is basically a thinned out burnt umber and white.  I usually have enough to stain a couple of medium sized canvases, so I can do more than one at a time (and that is one less excuse for starting the next painting)

Once dry, I will get the basic forms for the painting drawn onto the canvas.
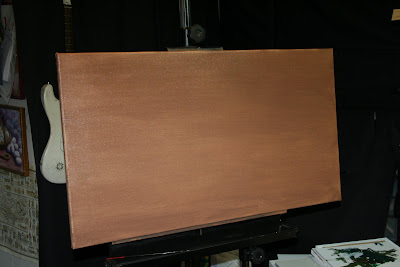
Canvas freshly stained
Staining gear...which I forgot to clean up

Look for an update soon with the basic layout sketched on the canvas.

May God bless you deeply,
Rob

Thursday, June 23, 2011

Process: Stretchin' a Canvas

I've been going through subject matter to paint next.  I had narrowed down to a few photos I'd taken over the past few years to use as source material for paintings and I really got stuck on this one photo:
Source photo for painting

It is my younger son a couple years ago on the beach.  After looking at the important elements, the best proportions and composition, I realized it would be best to have a more "horizontal" composition.  This should elongate the horizon and water/shoreline that are prevalent in this photo. 

What I have arrived at is a 20" x 36" canvas.  This had canvas had to be built.  Here is the real basic process:
Tools for the job

Stretcher bars assembled and laid out on canvas roll.  Cut to wrap around the back of the bars for a "Gallery Wrap"
Canvas cut down to size
Starting in the center of each side: pull tight, staple once, move to opposite side repeat... then start adding two staples to each side.  Canvas pliers help in really gripping the canvas to pull taut.
Corners are made like "hospital corner" on a bed

Monday, June 13, 2011

Poem Panels Installed

These are complete and installed (and yes I am actually making a post)!

The client is very pleased with the final product.  I think these look stellar as well.  I ended up heavily texturing each panel they have a very painterly look and nice relief.  These were not designed or intended to be a focal point, they are to be "background music" in the family's living area, as they are a backdrop to photos of three children.

Each panel is approximately 52 x 24 inches in size.

Well, pictures speak louder than words...so, have a look!

Panels Installed

Entire unit with photos in front of poems.  We will be updating with more transparent frames.  We will probably make another panel for the left side of the unit as well.

Live, love, laugh,
Thanks for looking,

Rob